
Hi fellow developers! In this post, we will see step by step, how to write a “Hello World” app in C#.
Introduction
Visual Studio is an extremely powerful IDE for building many types of applications.
In this dev tip, we are going to build a “Hello World” Windows forms application in C#.
If you don’t already have Visual Studio, the you can download Visual Studio Community Edition which is free.
Ok, let’s build our Hello World app!
In this example I’m using Visual Studio 2013 and .NET Framework 4.5 but the philosophy is the same for newer versions of Visual Studio and .NET Framework.
Developing the “Hello World” App in Visual Studio
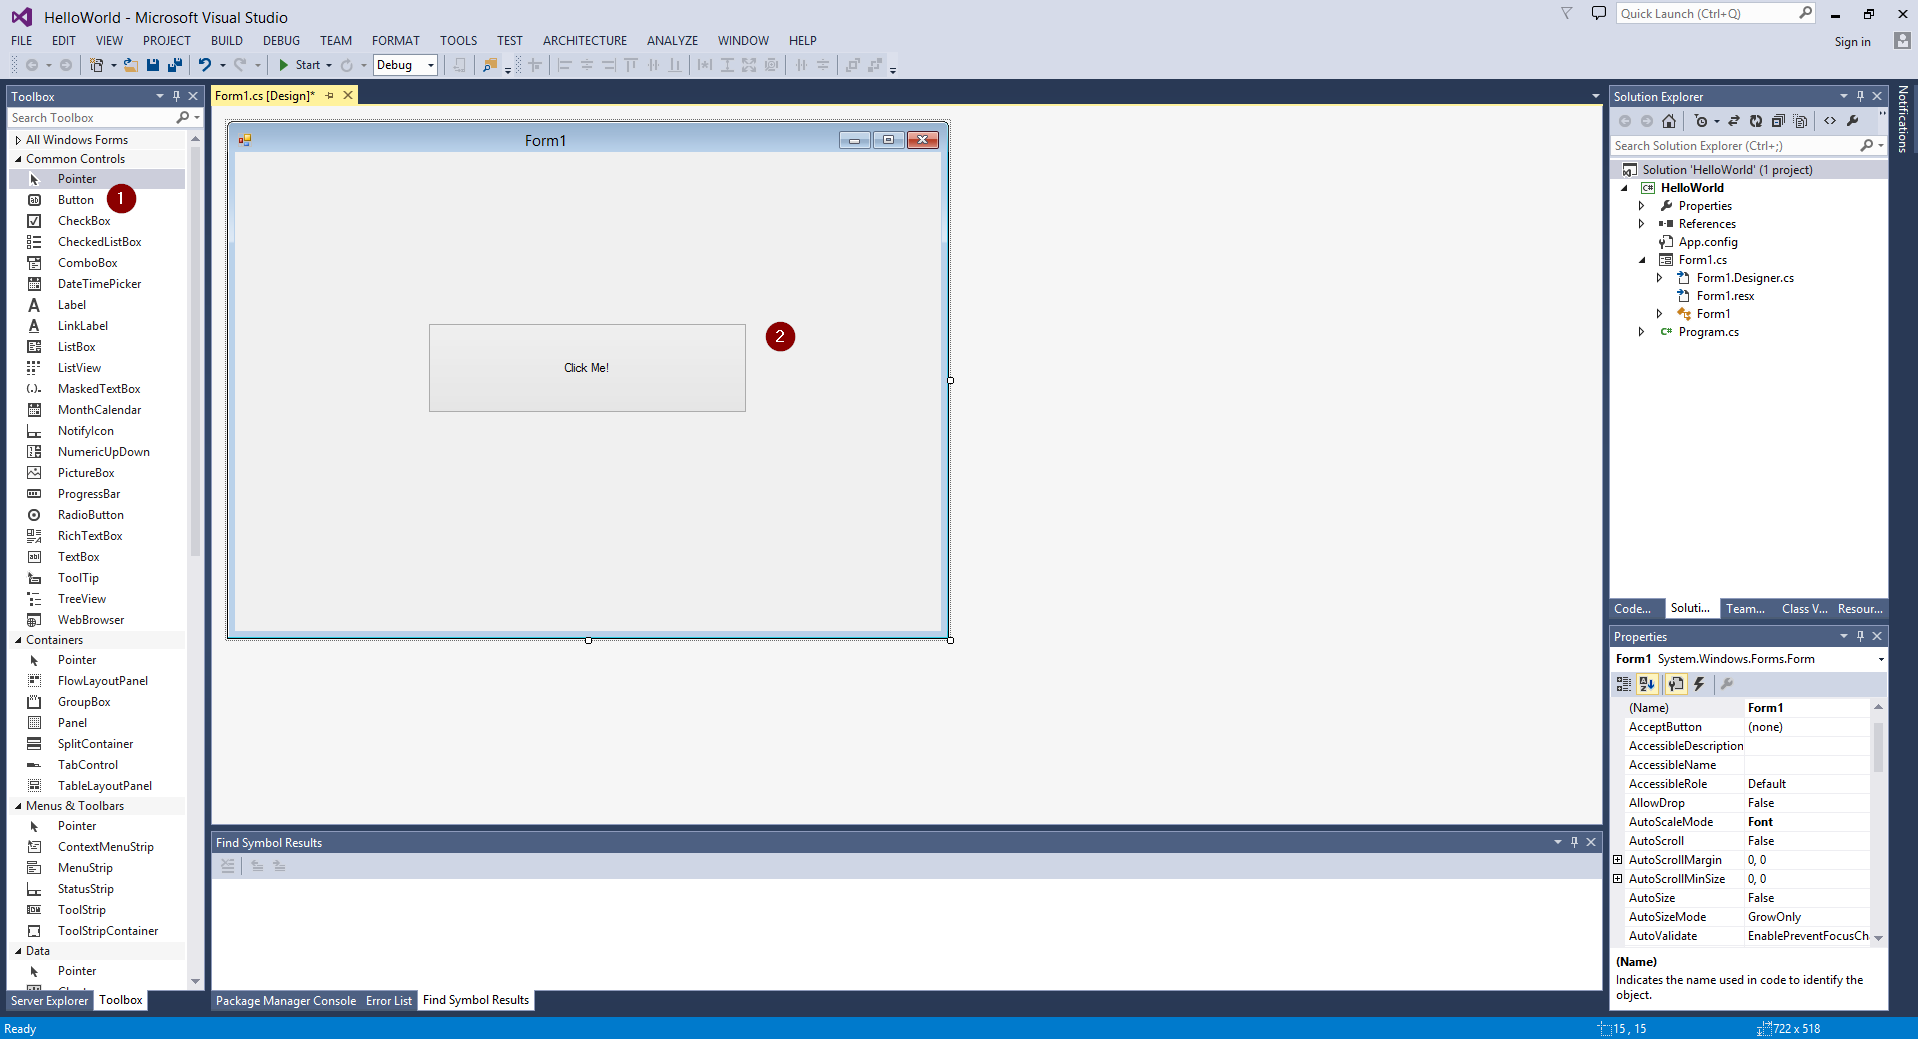
So, after launching Visual Studio, we click on “File“, “New“, “Project“.

We then select the template for this new project, in this case “Windows Desktop” (1), the version of .NET Framework to be used (2), the type of the project, in this case “Windows Forms Application” (3), the name and disk location of the project (4 and 5), and finally the solution name (6) which by default gets the same name as the project name but of course you can change it if you want. After all these are set, we click on the “OK” button.

Right after we click OK, the new project is ready for development. The below screenshot illustrates the development environment for this Windows Forms project.
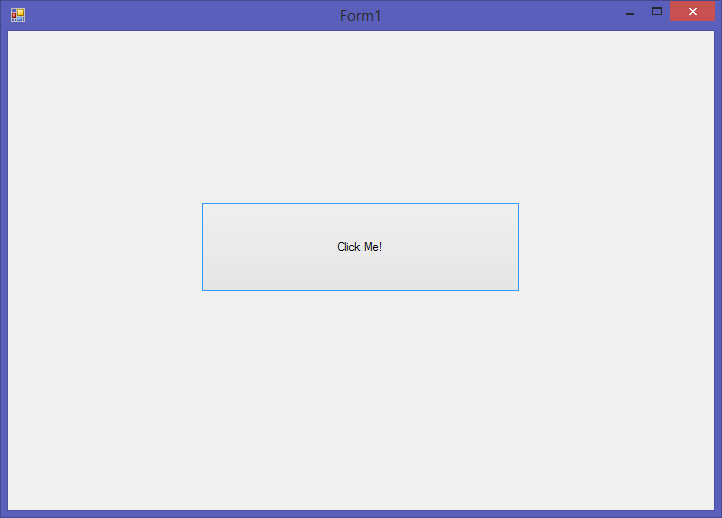
The next step is to drag and drop a “button” control from the toolbox right onto our form (named Form1 – you can change the name in the Properties dialog on the lower right section of the IDE).
Right after we add the button, we set the two below properties in the Properties dialog which can be found on the lower right section of the IDE):
- Name: btnClickMe
- Text: Click Me!
Now we need to set the button’s behavior when clicked. We double-click on the button control on the form and an “event handler” for the mouse click event on the button is automatically created. Now all is left is to add to the event handler the code we want to be executed when the button is clicked. To this end, we add the code: MessageBox.Show("Hello World! This is a C# program!");

Right after adding the code, we press F5 or click on the Start button (has the “play” sign) and if everything is OK, our program runs.
So let’s test our program by clicking on the “Click Me!” button:
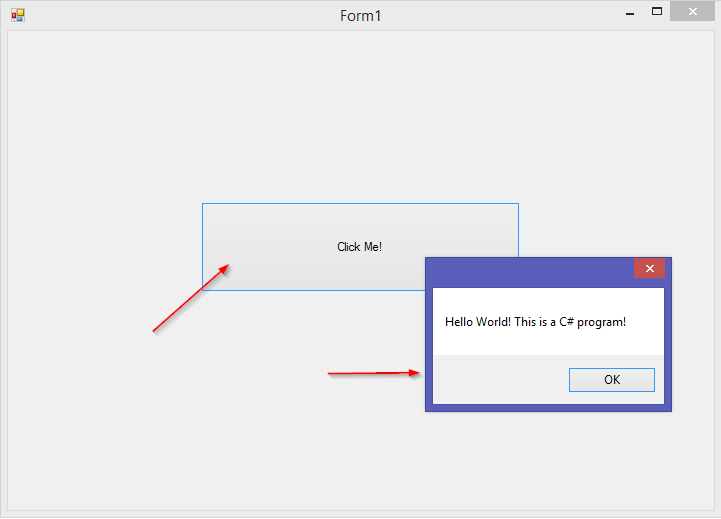
That’s it! As you can see, when we click the button a popup (message box) is presented displaying the “Hello World” message!
Recommended course: “.NET Programming for Beginners – Windows Forms with C#”
In this course for beginners, you will get started with .NET Windows Forms (WinForms) Programming using Visual Studio and the C# Programming Language. You will learn the basics of .NET Windows Forms, event handling, multithreading and how you can create deployment packages for your .NET Windows Forms programs, directly via Visual Studio, using the ClickOnce component.
Last but not least, throughout the course, we will be developing in different phases, a Text Editor demo app, using Visual Studio, C# and Windows Forms.
Recommended Online Courses:
- SQL Server 2022: What’s New – New and Enhanced Features
- Introduction to Azure Database for MySQL
- Working with Python on Windows and SQL Server Databases
- Boost SQL Server Database Performance with In-Memory OLTP
- Introduction to Azure SQL Database for Beginners
- Essential SQL Server Administration Tips
- SQL Server Fundamentals – SQL Database for Beginners
- Essential SQL Server Development Tips for SQL Developers
- Introduction to Computer Programming for Beginners
- .NET Programming for Beginners – Windows Forms with C#
- SQL Server 2019: What’s New – New and Enhanced Features
- Entity Framework: Getting Started – Complete Beginners Guide
- A Guide on How to Start and Monetize a Successful Blog
- Data Management for Beginners – Main Principles
Read Also:
- Understanding Dependency Injection in C#
- Creating Responsive WinForms with BackgroundWorker in C#
- How to Write a “Hello World” App in Visual C++
- How to Rebuild All Indexes Online for a SQL Server Database
- Benefits of Primary Keys in Database Tables
- Main Data Structures in Python
- How to Fix: Slow WiFi Internet Connection on Windows 10 Laptop
- SyntaxError: invalid syntax when using IF in Python – How to Resolve it
- Using Dynamic Memory Allocation in Java
Reference: {essentialDevTips.com} (https://www.essentialdevtips.com/)
© essentialDevTips.com
Rate this article:  (2 votes, average: 5.00 out of 5)
![]() Loading...
Loading...
Artemakis Artemiou is a Senior SQL Server Architect, Author, a 9 Times Microsoft Data Platform MVP (2009-2018). He has over 15 years of experience in the IT industry in various roles. Artemakis is the founder of SQLNetHub and {essentialDevTips.com}. Artemakis is the creator of the well-known software tools Snippets Generator and DBA Security Advisor. Also, he is the author of many eBooks on SQL Server. Artemakis currently serves as the President of the Cyprus .NET User Group (CDNUG) and the International .NET Association Country Leader for Cyprus (INETA). Moreover, Artemakis teaches on Udemy, you can check his courses here.